Displaying a WPF application icon in the notification area
A short set of instructions on how to get your WPF application to display its application icon in the notification area of your Windows screen (the area in the bottom right of your screen).
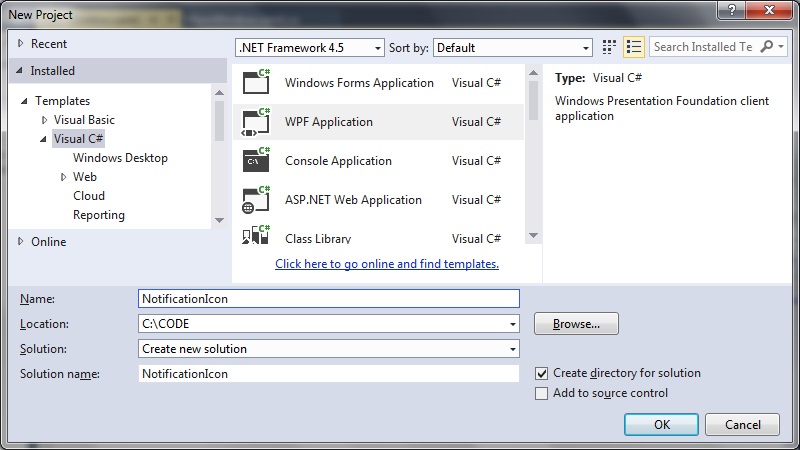
Step 1: create a new WPF application
 Step 2: Ensure the necessary references are added
In particular:
[code language="csharp"]
using System.Drawing;
using System.Windows;
using System.Windows.Forms;
[/code]
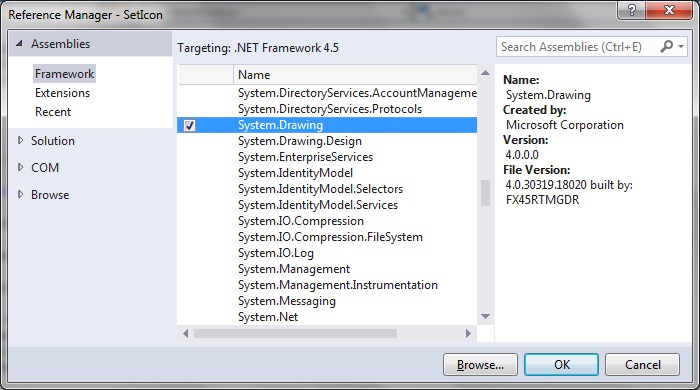
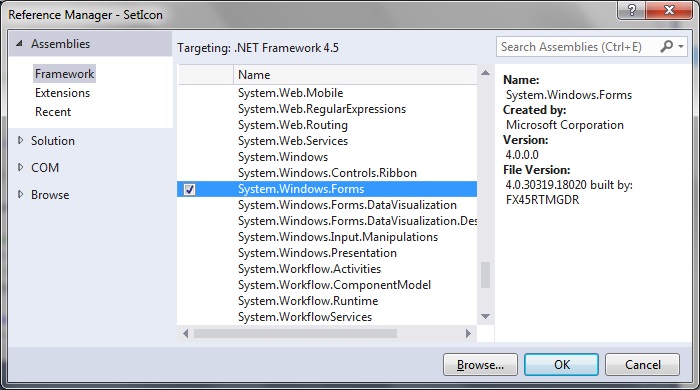
Also make sure System.Drawing and System.Windows have been added via Add Reference. Right click your References and select Add Reference:
Step 2: Ensure the necessary references are added
In particular:
[code language="csharp"]
using System.Drawing;
using System.Windows;
using System.Windows.Forms;
[/code]
Also make sure System.Drawing and System.Windows have been added via Add Reference. Right click your References and select Add Reference:
 Step 3: Modify MainWindow.xaml.cs code
Full code listing as follows.
In particular pay attention to how we create the NotifyIcon object and its other properties such as file location, visibility and text:
[code language="csharp"]
using System;
using System.Drawing;
using System.Windows;
using System.Windows.Forms;
namespace NotificationIcon
{
public partial class MainWindow : Window
{
NotifyIcon nIcon = new NotifyIcon();
public MainWindow()
{
InitializeComponent();
// Hide main window when the program begins
ShowInTaskbar = true;
//Visibility = Visibility.Hidden;
WindowState = System.Windows.WindowState.Minimized;
nIcon.Icon = new Icon(@"../../Icon.ico");
nIcon.Visible = true;
nIcon.Text = "Check for updates";
//nIcon.ShowBalloonTip(3000, "", "Check for updates", ToolTipIcon.Info);
}
}
}
[/code]
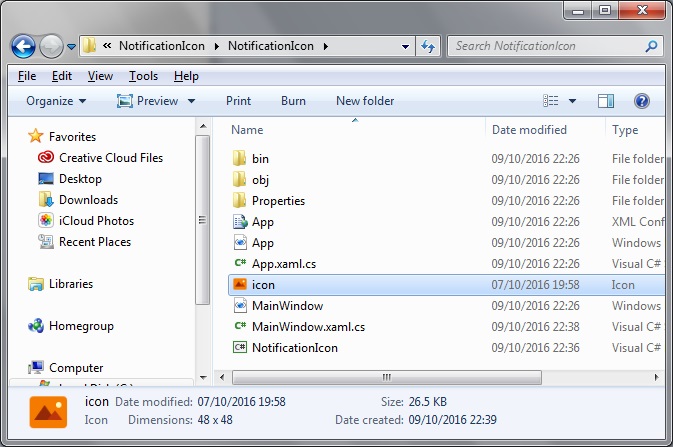
Step 4: Add the icon file to the project folder:
Step 3: Modify MainWindow.xaml.cs code
Full code listing as follows.
In particular pay attention to how we create the NotifyIcon object and its other properties such as file location, visibility and text:
[code language="csharp"]
using System;
using System.Drawing;
using System.Windows;
using System.Windows.Forms;
namespace NotificationIcon
{
public partial class MainWindow : Window
{
NotifyIcon nIcon = new NotifyIcon();
public MainWindow()
{
InitializeComponent();
// Hide main window when the program begins
ShowInTaskbar = true;
//Visibility = Visibility.Hidden;
WindowState = System.Windows.WindowState.Minimized;
nIcon.Icon = new Icon(@"../../Icon.ico");
nIcon.Visible = true;
nIcon.Text = "Check for updates";
//nIcon.ShowBalloonTip(3000, "", "Check for updates", ToolTipIcon.Info);
}
}
}
[/code]
Step 4: Add the icon file to the project folder:
 When the project is built and run we can see how the application icon appears in the bottom right of the screen as shown:

Step 2: Ensure the necessary references are added
In particular:
[code language="csharp"]
using System.Drawing;
using System.Windows;
using System.Windows.Forms;
[/code]
Also make sure System.Drawing and System.Windows have been added via Add Reference. Right click your References and select Add Reference:
Step 3: Modify MainWindow.xaml.cs code
Full code listing as follows.
In particular pay attention to how we create the NotifyIcon object and its other properties such as file location, visibility and text:
[code language="csharp"]
using System;
using System.Drawing;
using System.Windows;
using System.Windows.Forms;
namespace NotificationIcon
{
public partial class MainWindow : Window
{
NotifyIcon nIcon = new NotifyIcon();
public MainWindow()
{
InitializeComponent();
// Hide main window when the program begins
ShowInTaskbar = true;
//Visibility = Visibility.Hidden;
WindowState = System.Windows.WindowState.Minimized;
nIcon.Icon = new Icon(@"../../Icon.ico");
nIcon.Visible = true;
nIcon.Text = "Check for updates";
//nIcon.ShowBalloonTip(3000, "", "Check for updates", ToolTipIcon.Info);
}
}
}
[/code]
Step 4: Add the icon file to the project folder:
When the project is built and run we can see how the application icon appears in the bottom right of the screen as shown:


Comments
Post a Comment