Getting started with Java in Eclipse
1. Download Eclipse
Obtain the installer from the following site:
https://eclipse.org/downloads/
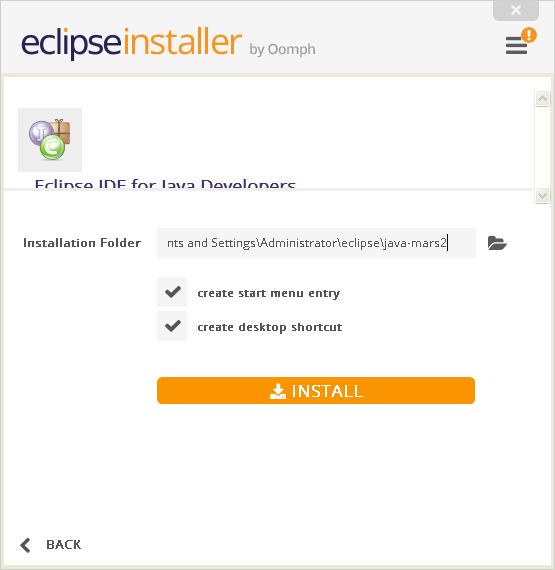
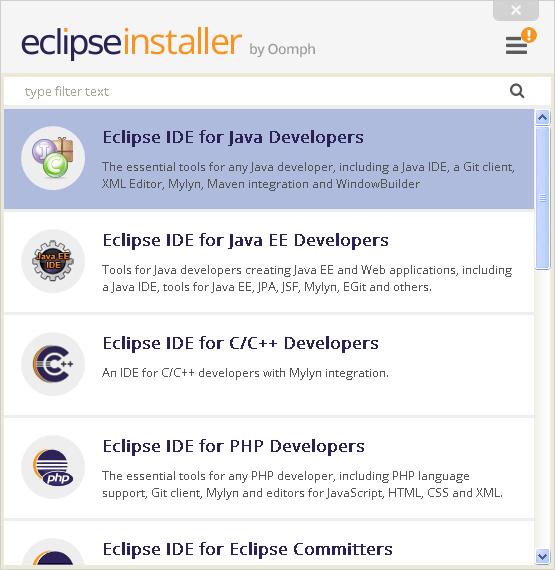 and complete the installation:
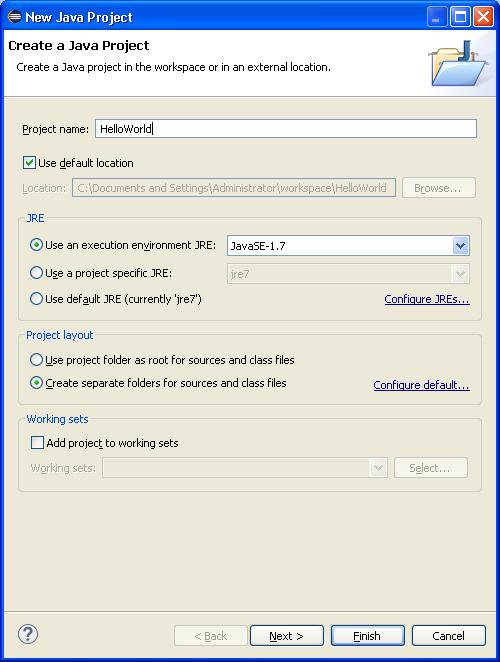
 2. Create a new Eclipse project
Open Eclipse and select File > New > Java Project. Give the project a name ('HelloWorld'):
2. Create a new Eclipse project
Open Eclipse and select File > New > Java Project. Give the project a name ('HelloWorld'):
 Click Next.
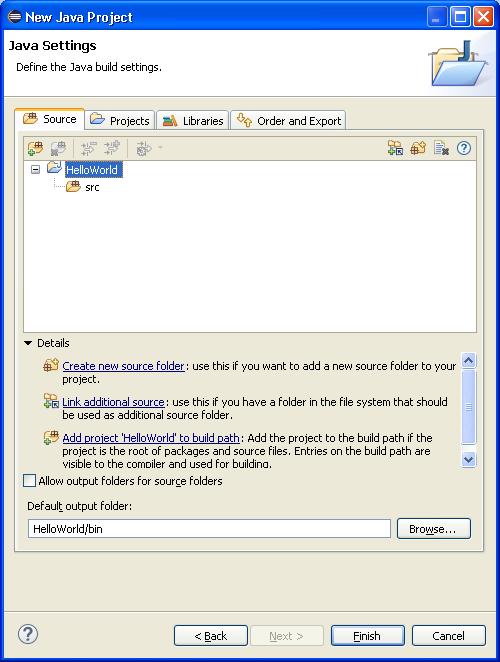 And then click Finish.
3. Add your Java class
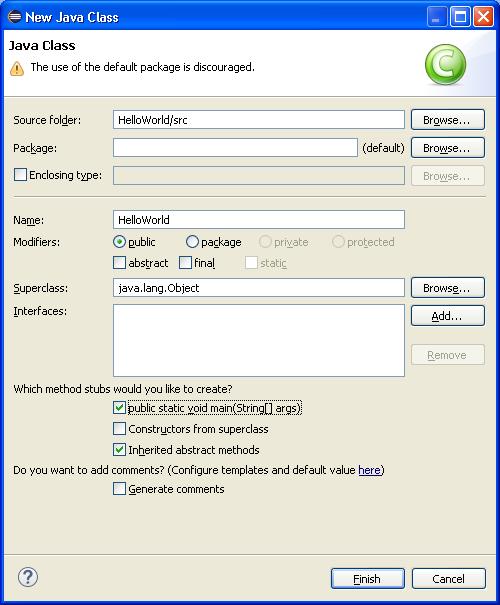
Select File > New > Class:
Set the Name field to 'HelloWorld' and check the box labelled 'public static void main(String[] args)':
And then click Finish.
3. Add your Java class
Select File > New > Class:
Set the Name field to 'HelloWorld' and check the box labelled 'public static void main(String[] args)':
 Click Finish.
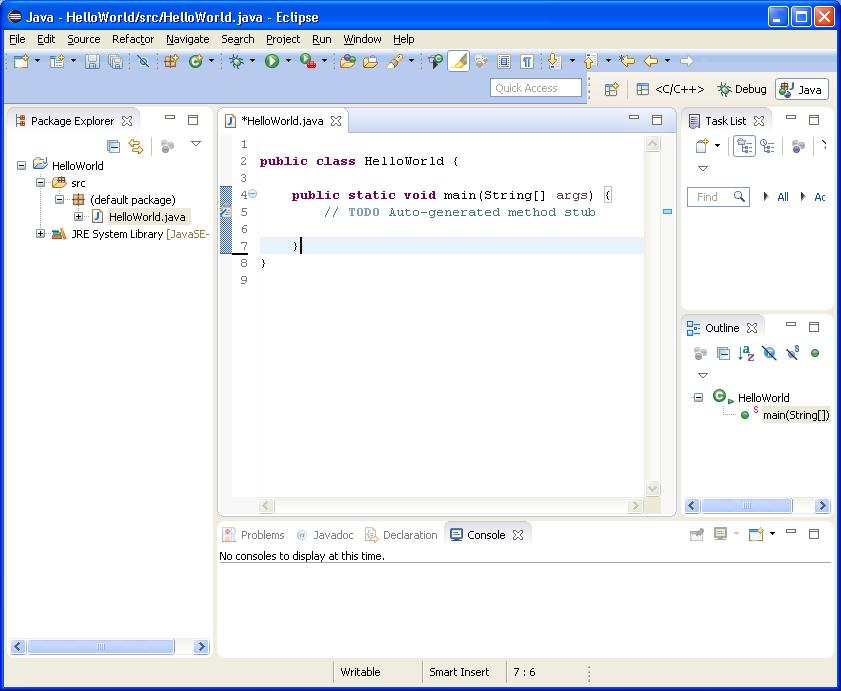
So that your project looks like this:
Click Finish.
So that your project looks like this:
 4. Write your code
In this example, the proverbial "Hello World" example:
[code language="java"]
public class HelloWorld {
public static void main(String[] args) {
System.out.println("Hello, World");
}
}
[/code]
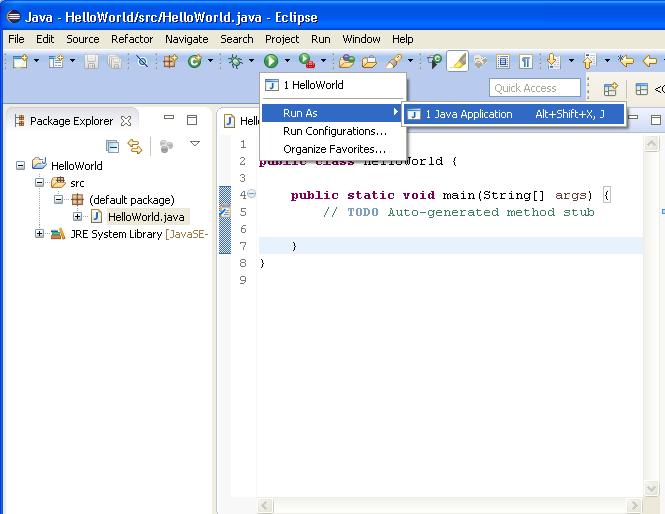
5. Build and run your Java project:
Select the down arrow next to the Run icon and select Run As > Java Application:
4. Write your code
In this example, the proverbial "Hello World" example:
[code language="java"]
public class HelloWorld {
public static void main(String[] args) {
System.out.println("Hello, World");
}
}
[/code]
5. Build and run your Java project:
Select the down arrow next to the Run icon and select Run As > Java Application:
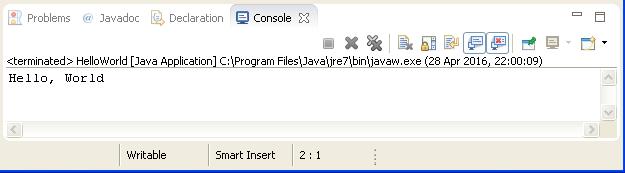
 Giving the desired "Hello World" console output:
and complete the installation:
2. Create a new Eclipse project
Open Eclipse and select File > New > Java Project. Give the project a name ('HelloWorld'):
Click Next.
And then click Finish.
3. Add your Java class
Select File > New > Class:
Set the Name field to 'HelloWorld' and check the box labelled 'public static void main(String[] args)':
Click Finish.
So that your project looks like this:
4. Write your code
In this example, the proverbial "Hello World" example:
[code language="java"]
public class HelloWorld {
public static void main(String[] args) {
System.out.println("Hello, World");
}
}
[/code]
5. Build and run your Java project:
Select the down arrow next to the Run icon and select Run As > Java Application:
Giving the desired "Hello World" console output:


Comments
Post a Comment