Getting Started with the CU Decision Diagram (CUDD) Package for Windows
I have managed to download, uncompress and compile this library in a Visual Studio environment. At last. Though a very powerful package for the implementation of binary decision diagrams, the documentation for its actual set-up for non-Unix environments seems a little sketchy and somewhat intimidating for the beginner. Here are some instructions for the most recent version at this time of writing (2.4.2). If I get any more useful insights, I will add them to this post accordingly.
1. Acquire CUDD v2.4.2
You can download CUDD v2.4.2 from this ftp site or visit Fabio Somenzi's home page and get it there.
Update 26 March 2018: Those links appear to have died. An alternative GitHub page for this package can be found here:
https://github.com/ivmai/cudd
This link also contains instructions which may complement this post.
2. Install CygWin and the  3. Fix the Makefile and source code issues
In addition to installing CygWin satisfactorily, the documentation tells you to run the
3. Fix the Makefile and source code issues
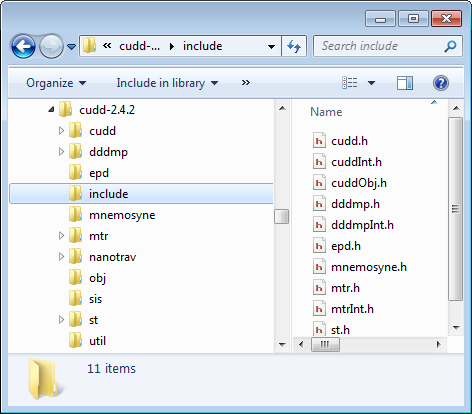
In addition to installing CygWin satisfactorily, the documentation tells you to run the  This should create the additional include directory with new header files as shown:
 There also should also be number of new c archive files created in the { util, epd, mtr, st, obj, dddmp } directories respectively:
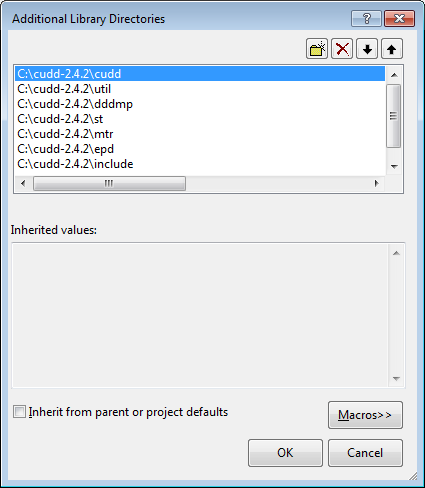
 In your project Configuration Properties, select Linker then General and then Additional Library Directories and insert the following directories:
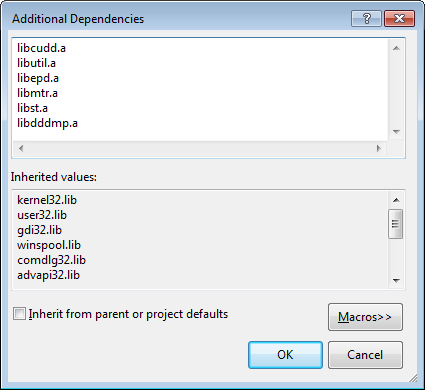
 In Project Configuration Properties, select Linker, Input, Additional Dependencies, and insert the following linked libraries:
 That is all there is to it. You might wish to check that anything utilising the CUDD project builds OK by using a simple code snippet eg:
[code language="cpp"]
// CUDD.cpp : Defines the entry point for the console application.
//
#include "stdafx.h"
#include "util.h"
#include "cudd.h"
int _tmain(int argc, _TCHAR* argv[])
{
DdNode* node1 = new DdNode;
return 0;
}
[/code]
That is all there is to it. You might wish to check that anything utilising the CUDD project builds OK by using a simple code snippet eg:
[code language="cpp"]
// CUDD.cpp : Defines the entry point for the console application.
//
#include "stdafx.h"
#include "util.h"
#include "cudd.h"
int _tmain(int argc, _TCHAR* argv[])
{
DdNode* node1 = new DdNode;
return 0;
}
[/code]
make program
You will then need to run some Unix-type commands in order to make the CUDD project. The way to run Unix/Linux commands and scripts directly in Windows is to use CygWin. This is available for free at http://cygwin.com. In order to run the make command at the command prompt, you must ensure it has been installed. When running the CygWin setup.exe facility, the make utility can be found in the 'Devel' subsection:
 3. Fix the Makefile and source code issues
In addition to installing CygWin satisfactorily, the documentation tells you to run the
3. Fix the Makefile and source code issues
In addition to installing CygWin satisfactorily, the documentation tells you to run the make command inside wherever you installed the CUDD 2.4.2 directory eg:
[code language="txt"]
C:\cudd-2.4.2>make
[/code]
It won't build properly just yet. But feel free to try this and watch it it not work.
Please be aware of two sources of trouble you need to address first, one in the Makefile and the other in the void util_print_cpu_stats(FILE *fp) contained inside the file cpu_stats.c (in the util directory).
Using your own choice of text editor, first edit the Makefile so that:
[code language="txt"]
XCFLAGS = -mcpu=pentiumpro -malign-double -DHAVE_IEEE_754 -DBSD
[/code]
becomes:
[code language="txt"]
XCFLAGS = -malign-double -DHAVE_IEEE_754 -DBSD
[/code]
Secondly in cpu_stats.c look for the code snippet that says
[code language="txt"]
#if defined(_IBMR2)
[/code]
and replace it with:
#if 0Then look for the first line inside the
void util_print_cpu_stats(FILE *fp) function and replace:
#ifdef BSDwith:
#if 04. Make CUDD Now
cd to the cudd-2.4.2 directory and go ahead with the make command.
This should create the additional include directory with new header files as shown:
There also should also be number of new c archive files created in the { util, epd, mtr, st, obj, dddmp } directories respectively:
$CUDD_ROOT/util/libutil.a
$CUDD_ROOT/epd/libepd.a
$CUDD_ROOT/mtr/libmtr.a
$CUDD_ROOT/st/libst.a
$CUDD_ROOT/obj/libobj.a
$CUDD_ROOT/dddmp/libdddmp.a
5. Link to the CUDD libraries
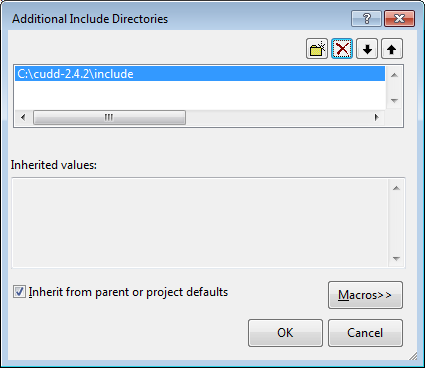
In Visual Studio, go to your project's Configuration Properties, select C/C++ then Additional Include Directories and set it to the new include folder:
In your project Configuration Properties, select Linker then General and then Additional Library Directories and insert the following directories:
In Project Configuration Properties, select Linker, Input, Additional Dependencies, and insert the following linked libraries:
That is all there is to it. You might wish to check that anything utilising the CUDD project builds OK by using a simple code snippet eg:
[code language="cpp"]
// CUDD.cpp : Defines the entry point for the console application.
//
#include "stdafx.h"
#include "util.h"
#include "cudd.h"
int _tmain(int argc, _TCHAR* argv[])
{
DdNode* node1 = new DdNode;
return 0;
}
[/code]


Comments
Post a Comment